A lot of people self host their own blogs or websites but its rare for someone to host their own domain name. For most people, the domain name hosting provided by the domain name registrar is sufficient for their use case. People who need more control and features usually use popular services like AWS, Cloudflare, etc. In this blog post, we will see how to host and configure your own name servers for self hosting all your domain names.
|
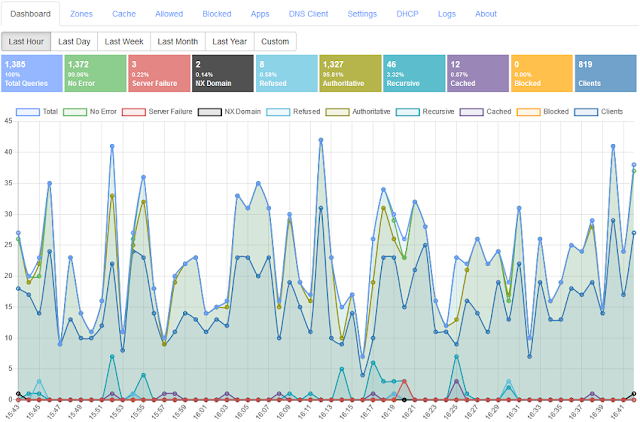
| Technitium DNS Server Is Both Authoritative And Recursive DNS Server |
Should You Really Self Host?
The first question that may come to your mind is that if you should really be self hosting your own domain names? Self hosting is not a solution for everyone and you need to evaluate your reasons before coming to a decision on it.
You should self host your own domain name if:
- You are looking to learn how to self host domain names so doing it will make sure that you learn all the aspects that come with it. This will help you learn how DNS works in general in a practical way.
- You are a hobbyist and interested in self hosting but don't have anything critical being hosted.
- You are an advanced user and want full control over your setup. You know exactly what you are looking for and are capable to handle any operational issues that may occur.
Pros And Cons Of Self Hosting
Self hosting your domain name gives you complete control over its setup and can use advanced features that may not be available elsewhere. But, like always this comes with its own pros and cons.
Some of the cons to self host your domain names that you may need to consider are:
- You are solely responsible for your name servers. Which means you need to regularly monitor the setup to make sure things are working well. Any failure can cause your website to stop resolving and your email from from being delivered and received.
- You need to have redundancy such that when your primary name server hosting your domain name fails, you have secondary name servers that can keep your domain name working.
- Someone can easily take down your name servers with a DDoS attack. This equally applies to other self hosted services like web servers running your blog or website. But there are mitigations available that we will discuss.
- Your name servers can be used for DNS amplification attacks. But for this too, there are mitigations like query rate limiting available to make such attacks useless.
But these pros to self host your domain names may want you to go ahead with it:
- You get absolute control over your domain name and can configure it to work anyway you wish.
- You get access to advanced features not available otherwise. You can also develop custom plugins that answer for your domain names as per your own business logic.
- Unlike hosting web servers, if one of your names servers is down, your domain name will still resolve. With web servers its a bit complex to manage this but with DNS, you don't have to worry about it that much. This is since, you need at least one of your name servers to be online so that your domain name resolves.
- You can sign your domain name for DNSSEC which may not be available with your current DNS provider. But not all Top Level Domain (TLD) names support DNSSEC so you may want to check that first. While this blog post does not cover DNSSEC signing, this subsequent blog post explains how to sign your domain name with DNSSEC.
- You get access to DNS logs and live stats which may not be available with your current DNS provider.
Minimum Requirements
Now that you have made a decision to proceed, lets see the minimum requirements for the complete setup. To host you own name server, you need a server with a static IP address. You can host the server in-house but its recommended to use a cloud hosting provider like Digital Ocean (referral link). This is since, hosting a server in-house requires you to have an Uninterrupted Power Supply (UPS) setup to make sure the server keeps running during power outage and also have a stable Internet connection, which may be one of the most challenging thing to have in your region. Using a cloud hosting provider, all these challenges are outsourced so that you do not have to worry about downtime and backups.
A server with basic config like single core CPU and 1GB RAM can be sufficient for most cases. Such a server will will cost as low as $5/mo with Digital Ocean (referral link).
For redundancy, you should have at least one secondary name server so that if your primary name server does down for any reason, your domain keeps resolving via your secondary name servers. Ideally, the secondary name server must be in a different region so that any issue affecting the primary name server does not affect the secondary name server too. There are some free and paid secondary DNS hosting options available too that you can choose from which we will see later.
Another important requirement is that your domain's Top Level Domain (TLD) must support configuring "child name servers". A child name server is a feature that allows you to register a subdomain name of your own domain to be used as your own name server. For example, if your domain name is "example.com", a child name server domain will be something like "ns1.example.com" or "ns2.example.com". This allows you to use something like "ns1.example.com" as the domain name for your primary name server that is hosting your "example.com" zone.
If you have a .com or .net domain name then these TLDs support this feature but other TLDs may not support it. In such case, you need to buy a domain name whose TLD supports child name servers and use that domain for all you other domain names as the name server. To know if your TLD supports child name servers, just login to your domain registrar's DNS panel and find if there is a "child name server" or "register name server" option to configure in your domain's advanced settings.
The Plan
In this blog post, we will setup one primary name server and optionally another one to act as the secondary name server for redundancy. You can add any number of secondary name servers as you wish depending on your requirements or plan to get a secondary DNS hosting provider.
To move further with installation and the configuration, its important and helpful that you understand how DNS servers do recursive resolution. There are different types of DNS servers that perform different functions but, a single DNS server software can support to perform all of these functions.
The common types of DNS servers are:
-
Authoritative Name Servers
These are the DNS servers that host a domain name. The domain name is hosted as a zone which means that any request for the domain name and its subdomain names can be answered by this server. Which is why its called as the authoritative name server for that domain. To self host your domain name, we are going to setup authoritative name servers.
An authoritative name server will respond with an answer to request only for the domain names it has a zone hosted for. A zone is a collection of DNS records that the authoritative name server must answer to. Any request with domain name not hosted will be responded with a REFUSED response code to indicate that the authoritative name server does not know an answer for the question.
There can be one or more authoritative name server for a domain name. One of them is the primary name server while the rest of the other are secondary name servers. You can update DNS records only on the primary name servers and any changes you make are automatically synced to the secondary name servers.
-
Recursive Name Servers
These are the DNS servers that are commonly hosted by ISPs or public DNS providers like Google DNS, Cloudflare DNS, or Quad9. Internet client devices send a request to these servers when they want to resolve a specific domain name. Its the task of these servers to perform recursive resolution which is a process to discover the list of authoritative name servers for the domain name and then query them to find the answers requested by the client.
A recursive name server has a preconfigured list of 13 root servers. These root servers are spread across the world and contain list of all Top Level Domains (TLDs) with their authoritative name server domain names and their IP addresses (known as glue addresses). The recursive resolution process first queries one of the root servers for the domain name to be resolved for which it receives a list of authoritative name servers for the domain's TLD. The recursive resolver then proceeds by sending a 2nd request to these new list of authoritative name servers for which it now receives another list of authoritative name servers for the domain name in the request. The recursive resolver again proceeds by sending a 3rd request to these authoritative name servers for the domain name to receive the final answer to the original question. This answer is cached to avoid repeating the recursive resolution process over and over again.
-
Stub Resolvers
These are the DNS servers that are commonly running on your WiFi routers and also on your device's operating system. These DNS servers forward any request they receive to Recursive Name Servers and cache the responses in memory to avoid frequent queries over network and to improve performance.
So, when you enter a website's address in your web browser, the domain resolution request is first received by the stub resolver running on your device which then forwards the request to the DNS server IP addresses that are configured on your network adapter which usually will be the IP address of your Internet WiFi router. This router's stub resolver then forwards the request to the DNS server IP address configured in its WAN settings by your ISP which are the Recursive name servers.
Now that you have a fair understanding of the plan and some basic concepts that we can proceed with the installation.
Installation
We will install Technitium DNS Server on your server and call it as the primary name server. You can optionally choose to create one or more secondary name servers by following the exact same installation steps.
We will be using Ubuntu server here but you can choose any distro of your choice and follow similar instructions. You can choose to use a different OS for your server but its recommended to use a Linux based OS to keep the hosting costs to a minimum.
Connect to your server using SSH and run the single line installation command given below to install the DNS server. You can also install it as a docker image or manually install the DNS server by following the detailed install instructions.
$ curl -sSL https://download.technitium.com/dns/install.sh | sudo bash
Once the installation is complete, you can access the DNS server's web console at http://<server-ip-address>:5380/ and quickly setup a strong admin password.
Configuration
Before proceeding with the configuration, you must decide the domain names to be used for your primary and secondary name servers (if any). For example, if your domain name is "example.com" then you should select something like "ns1.example.com" as the domain name for your primary name server, "ns2.example.com" as the domain name for your secondary name server, and so fourth if you wish to have more than one secondary name servers.
If your domain's TLD does not support registering child name servers, then you need to first host a domain name which supports it. If you don't own such a domain name then you need to buy one before proceeding.
Make a list of the selected domain names for your name servers with their corresponding IP addresses as shown in the example below to help with the configuration:
ns1.example.com		<primary name server's ip address>
ns2.example.com		<secondary name server's ip address>
If your server hosting provider supports IPv6 then enable IPv6 for your server and enter the IPv6 address too in the above said list.
Configuring Primary Name Server:
We will now proceed to configure the primary name server. Login to the primary name server's DNS web console and follow the steps below:
- Go to the Settings > General section, set the selected primary name server's domain name as the "DNS Server Domain", and click on Save Settings button at the bottom.
- Go to the Zones section, and click on the Add Zone button. Enter your domain name that you want to self host in the Add Zone window, keep the Type as Primary Zone and click on Add button to create a primary zone for your domain name.
- Once you have created the primary zone, you will see only one NS record and an SOA record. Edit the SOA record and enter a valid email address as the "Responsible Person" on which you can receive emails and save the record.
- Add NS records for all of the secondary name servers that you have planned. You do not need to enter any glue address for adding the NS records.
- Add A records for all the name servers based on the list of name servers you prepared before starting the configuration. Each NS record's domain name must have a corresponding A record in the zone. If your name servers have IPv6 address, add AAAA records too for them corresponding to each NS record.
- Add all the other records for the primary zone manually by referring at your existing DNS provider's panel. Once you have added all the records, the primary zone is ready for the next step.
Switching Domain's Name Servers:
Now that the primary zone is ready with all the records, we can proceed to make it live so that other recursive name servers on the Internet can find it to resolve the domain name. To do that, login to your domain registrar's DNS panel and follow the steps below:
- Find your domain name in the registrar's DNS panel and click on it to see the details section.
- Find option in the domain details section that says something like "Nameserver Registration" or "Child Nameservers". Once you find the correct option, enter the child name server domain names from the list of name servers (e.g. ns1.example.com) and their corresponding static IP addresses. Once you save the changes, the registrar will update your TLD's name servers with the details of the child name servers and their IP addresses (glue addresses).
- Find option in the domain details section that says something like "Manage Nameservers". Once you find the correct option, enter the domain names of all your name servers that were registered in the previous step. Remove any previously existing name server entries that you see in there and keep just the ones you have entered. Once you save these changes, you will start seeing traffic coming on your primary name server as soon as the the name server (NS) records changes are updated to your TLD name servers. This can be as quick as a few seconds or may take a while for some TLDs depending on how they have implemented the update process.
Testing Primary Name Server:
You can test your setup to confirm if your primary name server is indeed answering requests for your domain using the DNS Client website. Just go to dnsclient.net, keep the Server option to Recursive Query, enter your domain name, and click on Resolve button. In the response that you get, you should see the "Metadata.NameServer" set with the domain name of your primary name server. If its still showing you one of the the domain names of your old name servers then it means that the changes have still not updated and you should wait for some more time to test it again.
Configuring Secondary Name Servers:
Once you have made sure that the primary name server is resolving the domain name, you can then configure one or more optional secondary name servers. Its recommended to have at least one secondary name server but if you do not wish to have one, you can skip this part. Login to the secondary name server's DNS web console and follow the steps below:
- Go to the Settings > General section, set the secondary domain name as the "DNS Server Domain", and click on Save Settings button at the bottom.
- Go to the Zones section, and click on the Add Zone button. Enter your domain name in the Add Zone window, select the type as Secondary Zone, and click on Add button to create the secondary zone. To add secondary zone, primary name server addresses were not needed since the domain name is publicly resolvable and so the DNS server will find out the primary name server automatically.
- Once the zone is created, the DNS server will try to perform zone transfer to sync all the DNS records from the primary zone into the secondary zone. The zone status will show as Expired till the records are synced. You can click on the refresh icon next to the domain name in the zone to check if the records have been synced. If the records didn't sync and the zone status is still Expired after a minute, you should check the DNS server's logs from the web console to see if there are any errors.
When you see the records populate in the secondary zone, the configuration for it is completed. Repeat the same steps for any other secondary name servers that you may have planned. Since, we had added registered all the name server domain names in the domain registrar's panel, the secondary name server will too start seeing traffic for your domain name soon.
Self Hosting Another Domain Name
Now that you have one of your domain names self hosted, you can add one or more of your other domain names to self host. Follow the steps below for self hosting your other domain names:
- Login to your primary name server's DNS web console.
- Go to Zones section and add a new primary zone for your second domain name.
- Once the primary zone is created, you will see one NS and an SOA record. Edit the SOA record with a valid email address that you can receive emails on.
- Add NS records for your secondary name servers that you wish to be used for this second domain name. You do not need to provide any glue addresses for these NS records.
- Add all other records in the primary zone to complete the primary zone configuration.
- Login to your secondary name server's DNS web console.
- Go to the Zones section and add a new secondary zone for your second domain name.
- The secondary name server will perform automatic zone transfer to sync all the records from your primary name server.
- Login to your domain registrar's web panel.
- Find the second domain name and click on it to see the details section.
- Find option in the domain details section that says something like "Manage Nameservers". In this option, remove the existing name servers and add the domain names of your primary and secondary name servers. Once you save these changes, you will soon start seeing traffic coming on your primary and secondary name servers for your second domain name.
Additional Configuration
Apart from the configuration to host the zones, there are a few things that must be configured too:
-
Enable HTTPS for DNS Web Console
You should enable HTTPS for the DNS web console for security reasons. The bare minimum option is to enable HTTPS with self signed TLS certificate option in Settings > Web Service section. A better option is to configure certbot to renew Let's Encrypt certificate and configure it in the Settings > Web Service section. -
Query Rate Limiting
To mitigate from attacks that use your DNS server for DNS amplification attacks, you should configure the Queries Per Minute (QPM) options in Settings > General section to rate limit queries per client subnet. -
Drop Requests App
Install the Drop Requests DNS App from the Apps section's App Store option. This app will allow you to drop requests that match from the given list of names and/or types. Take a look at the app's json config to see how certain names or types can be blocked. -
Backup
Once all the config is complete you should take backup for the entire DNS server from Backup Settings option in the bottom right of the Settings section. It is recommended to take regular backups this way so that you can quickly restore from the latest backup when your DNS server requires rebuilding due to any issues. Enabling backup option with your cloud hosting provider is also highly recommended.
Configuring 3rd Party Secondary DNS Provider
There are 3rd party DNS hosting providers that allow you to host secondary zones with them. Most of them are paid services but if you are hosting your personal project domain names then you can use the free secondary DNS service provided by NS-Global. Follow the sign-up instructions on their website to add a secondary name server for your domain names. Note, that you will need to use the Zone Options to configure zone transfer and notify for setting up the secondary zone with NS Global.
Once you have the secondary zone created with NS Global, you can update the name servers for your domain from the domain registrar's panel to allow discovering the new secondary name server.
Conclusion
With some efforts to learn DNS concepts, its possible for anyone determined to self host their own domain names. Technitium DNS Server allows easy installation, configuration, and maintenance of DNS zones with minimal efforts. With 3rd party secondary DNS service, you can add more redundancy and reliability to your setup.
If you have any comments or queries, do let me know in the comments section below or send an email to support@technitium.com.